Antivirus & Excel Security Settings

Security Information & Requirements

In a world of ever-increasing computer security threats, we at XLforms find ourselves challenged with seamlessly blending our code with Microsoft software requirements, Antivirus software, and other related software demands.

Furthermore, it’s our duty to inform our customers of such new requirements, while at the same time making sure that our applications perform as advertised.

In this manual we will address all related security issues that have been reported to us, and we will explain how to install and run our application while complying with the latest industry demands.

Antivirus Security Notes

All XLforms applications include industry standard trusted signed certificates. 

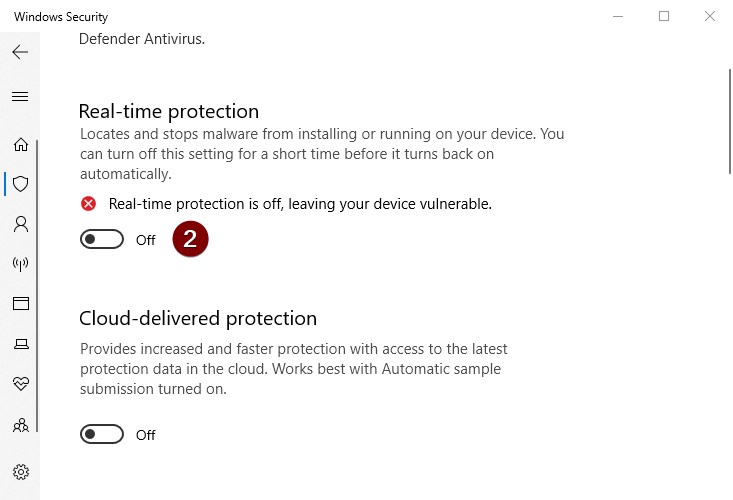
Antivirus software may hinder the installation of our product. If you get a false-positive detection from the antivirus and if the application fails to install, you will need to temporarily disable your antivirus software (see instructions below) and then try to install again. Remember to re-activate your antivirus upon successful installation.

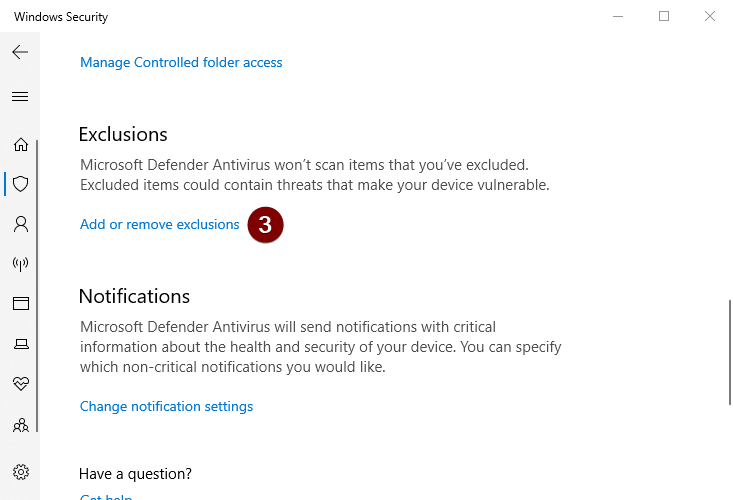
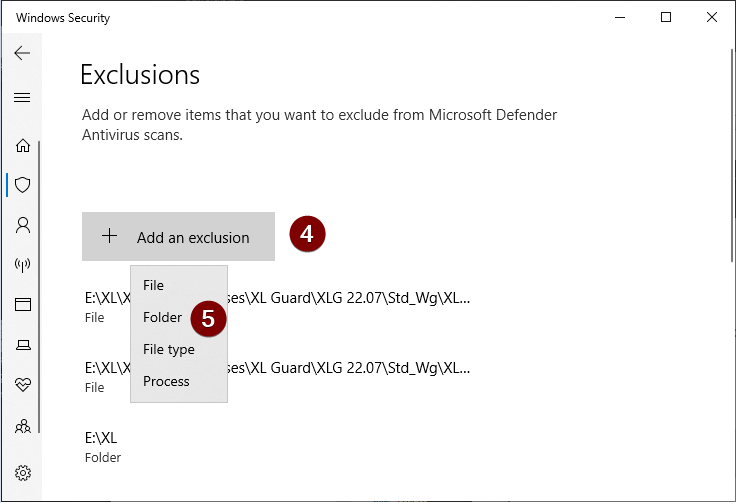
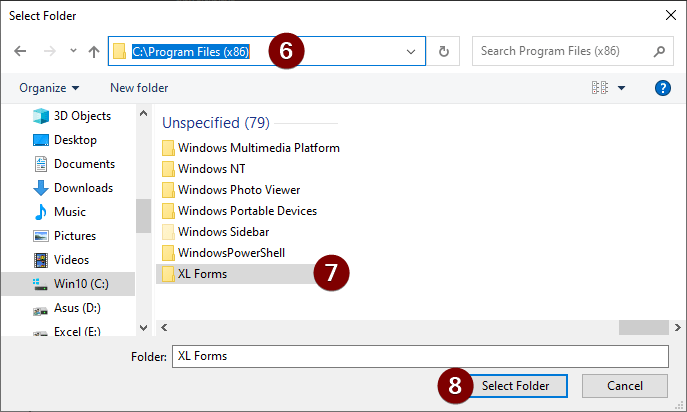
To reduce antivirus false-positive detections, you may need to add our  application’s folder location and the folder path where you want to save your future workbooks to the antivirus software’s exception list(see instructions below). 

Microsoft Excel Security Notes

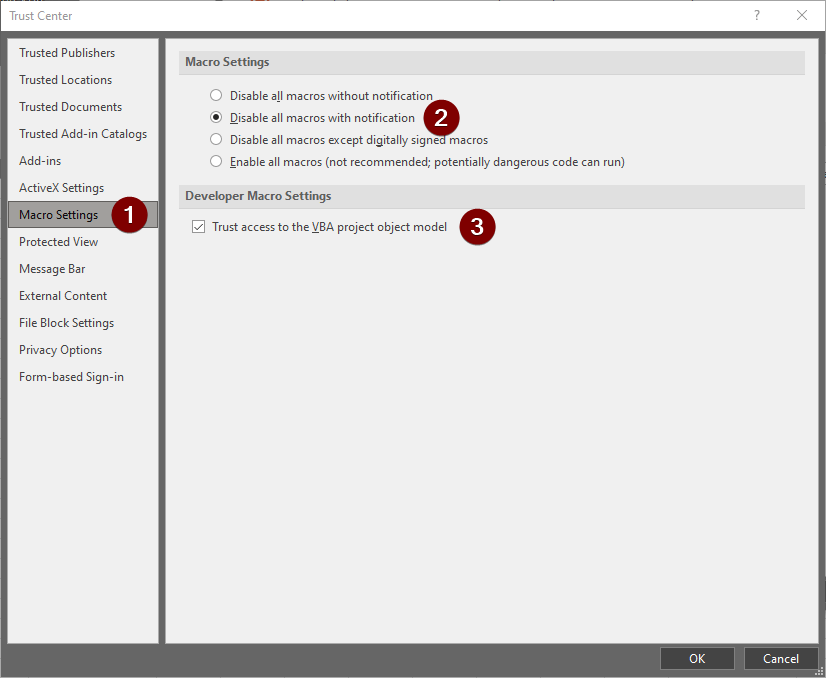
XLforms’ applications are developed for Microsoft Excel using Microsoft Visual Basic for Applications (VBA) programming language.

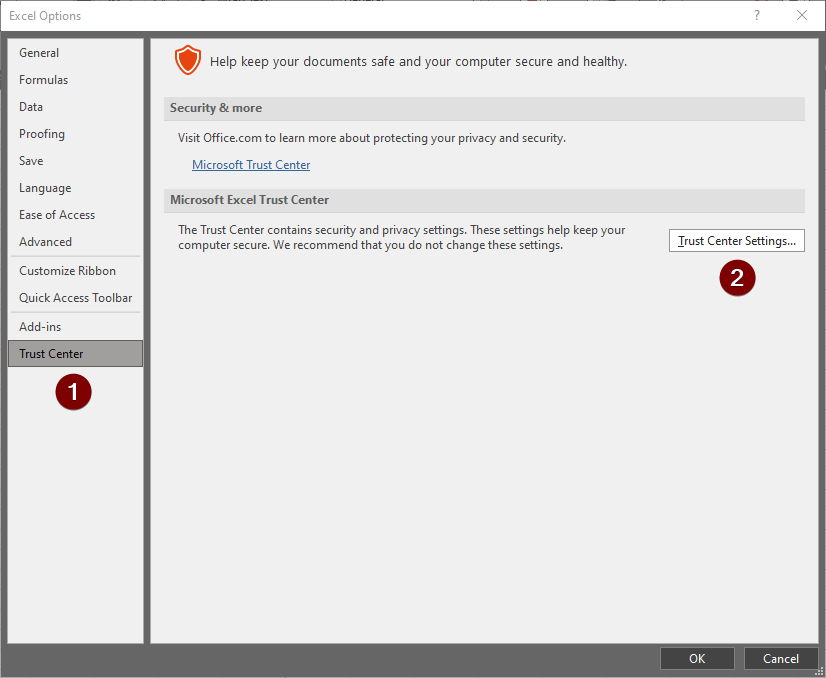
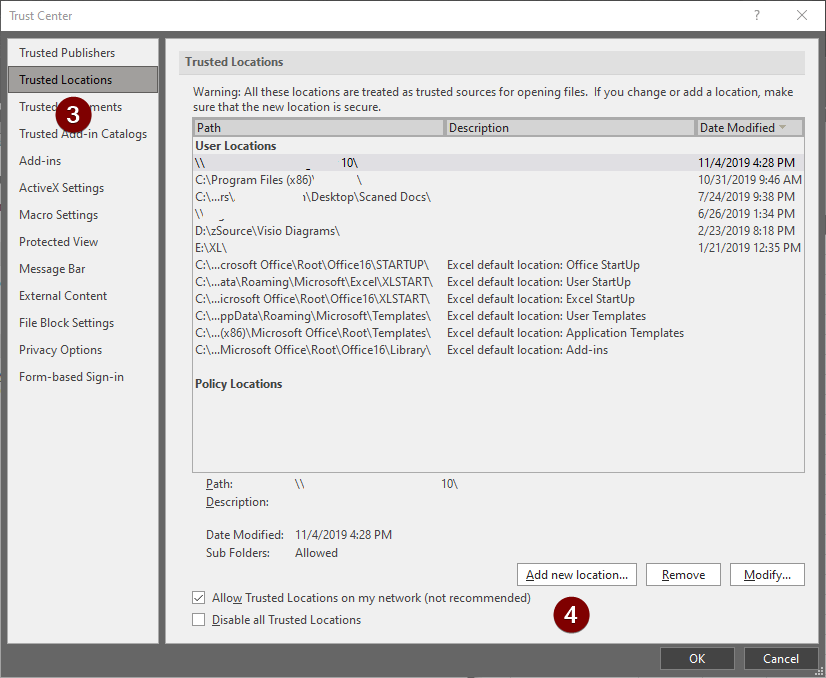
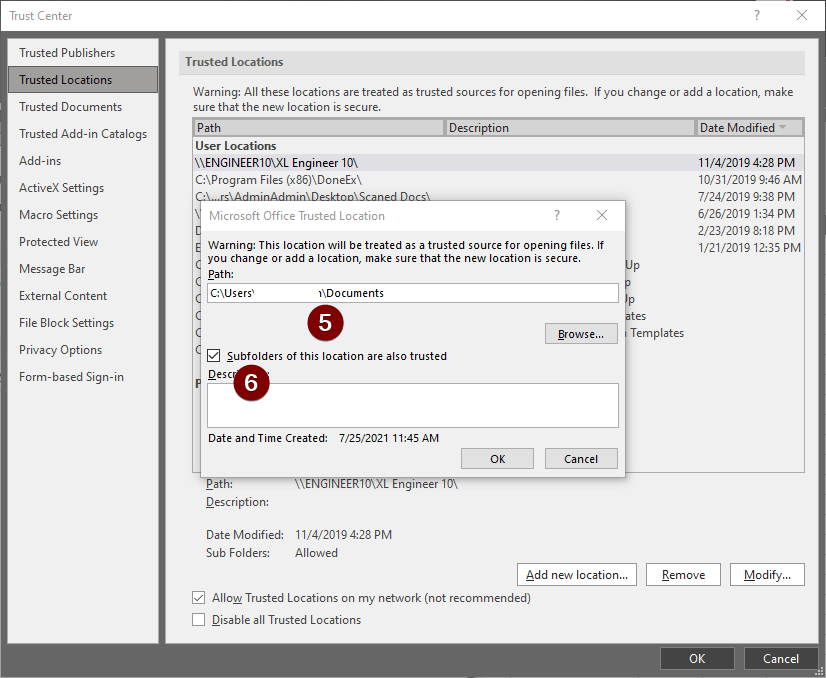
As a result, it requires you to enable Excels’ macros (see instructions below), and preferably, add the path where you plan to save your macro enabled workbooks to Excel’s Trusted Locations list (see instructions below).

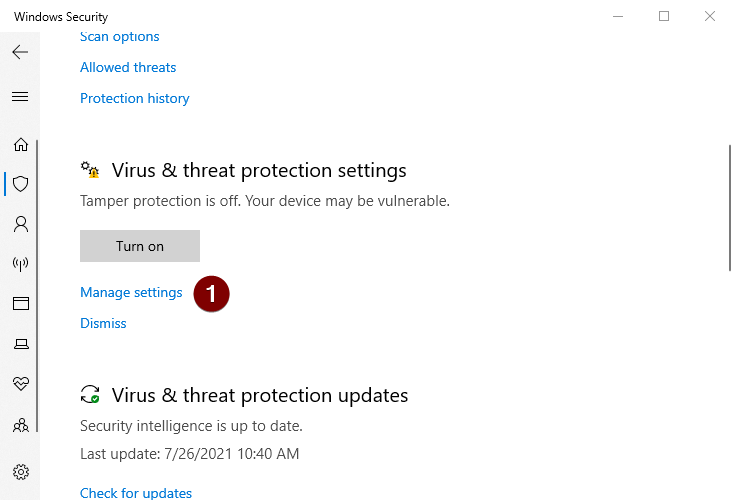
Set your Antivirus to run XLforms applications

In the example below, we are using Windows Security (Windows Defender). 

Temporarily disable your Antivirus:

Open Windows Security (with Windows 10, you can type it in to the search bar).
Select Virus & threat protection.

Click Manage Settings (1).

Under the Real-time protection section, click the On (2) switch
(assuming it’s set to on) to pause real-time scanning.

Note: You may get a message “Do you want to allow this app to make changes to your device?”       Select yes to continue.

The switch position should show Off (2)

Add XLforms application files to the Antivirus exception list:

While you are on the Manage settings page, scroll down to the Exclusion section and click on Add or remove exclusions (3)

Click on Add an exclusion (4) and then click on Folder (5).

Next, navigate to XLforms’ default applications folder location under
C:\Programs Files (x86)”  (6), select “XL Forms (7) and then click on
Select Folder (8) button.

We recommend that you create a folder to store your safe Excels’ macro enabled files. For example: crate a new folder in c: drive and name it “My Safe Excel Files”. Next, repeat the above steps 4-8, and add the new folder path
C:\My Safe Excel Files” to the antivirus folders exclusion list.

Remember to re-activate your antivirus upon successful installation!

Set Microsoft Excel security 

Turn on Excel’s macro settings:

Open Excel, Click File > Options.
1. Select Trust Center from the left side options.
2. Click Trust Center Settings on the right side.
3. Select Macro Settings from the left options.
4. Select Disable all macros with notification on the right side.
5. Select Trust access to the VBA project object model on the right side.

Click OK to accept your new settings and continue with setting Trusted Locations.

Set Excel’s Trusted Locations:

By default, new or unknown files are opened in Protected View by Excel, which prevents our application from functioning properly.

If you know the new macro enabled file is from a reliable source, it’s better to move the file to a trusted location, instead of changing the default Trust Center settings to a less safe macro security setting. You should use a trusted location to store your XL Guard workbook files to prevent the Trust Center from hindering the normal behavior of our product or completely blocking it.

Add a trusted location:
Open Excel, Click File > Options.
1. Select Trust Center from the left side options.
2. Click Trust Center Settings on the right side.

  1. Select Trusted Locations from the left options.
  2.  Click Add new location on the right side.
  1. Click Browse and find the folder you previously crated for the Antivirus exclusions list, select the folder and then click Ok.
  2. Optionally: Select “subfolders of this location are also trusted”.

Click OK again to accept the new settings.

You are now ready to enjoy XLforms applications.