Custom Timecard Creation
Overview - 4 steps
Custom Timecard Creation - step 1
Custom Timecard Creation - step 2
Custom Timecard Creation - step 3
Custom Timecard Creation - step 4 (for advanced users)
Custom Timecard Creation - in depth
Create your own template (URL: https://xlforms.com/template-design-manual/)
The XL Timecard Generator comes with several sample templates for every new user. While they should suffice for any small business, you may find that your business has particular needs which are not satisfied by those provided.
XLforms offers two options to you in this case.
- If you have something particular in mind, but lack the technical chops to adjust the templates as you would like to, you may submit your request and receive a quote for a custom template that better suits your needs.
- If you have a better understanding of Excel, you may adjust and edit one of the provided samples. In addition to the protected templates that come with the application, new users will be provided an “unlocked” template that can be customized as preferred.
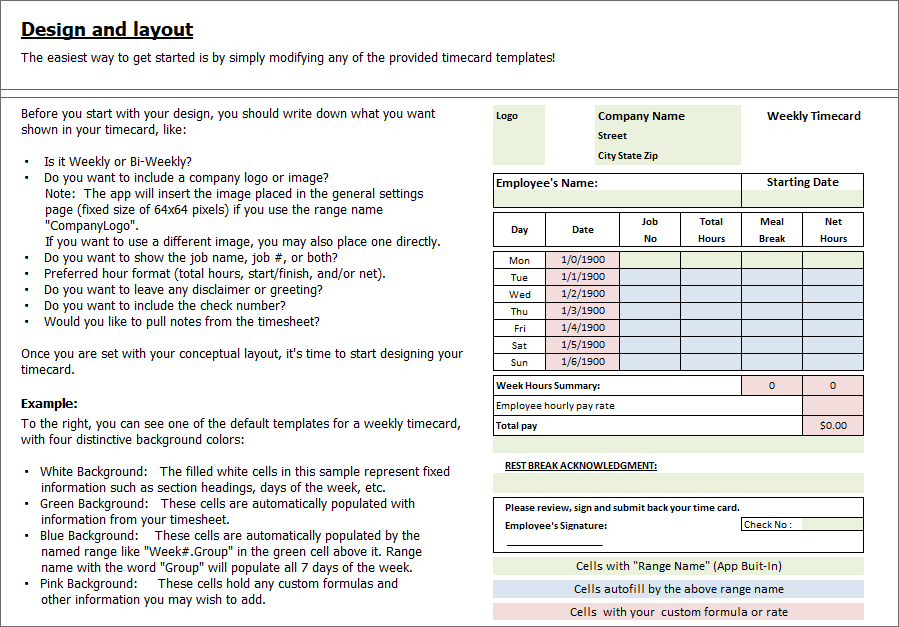
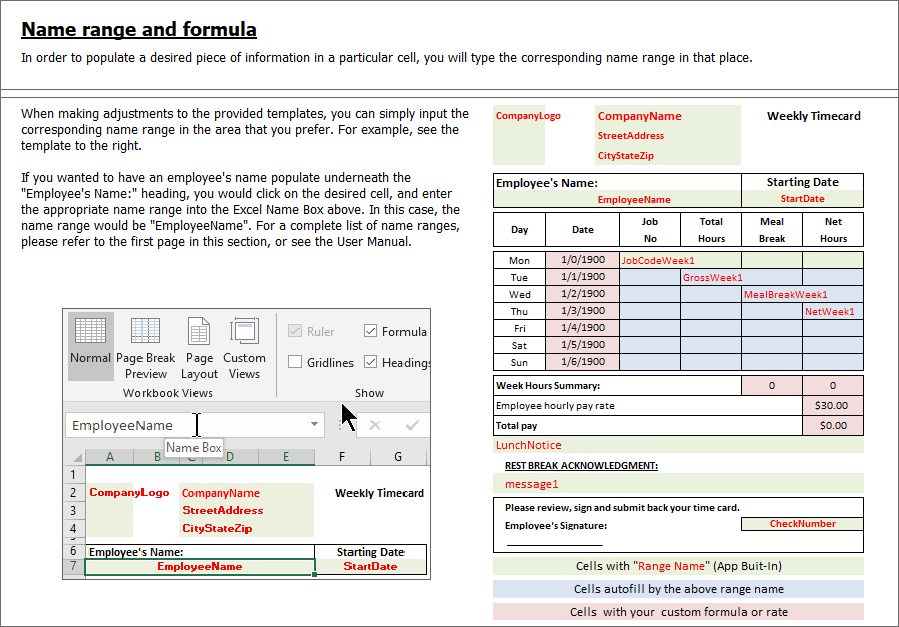
Adjusting the template:
Throughout our templates, we use unique codes — or “Named Ranges” as they are referred to in Excel — to populate the timecard templates. Currently, we have over 50 custom named ranges that you can use while customizing your timecard template. Please refer to our complete Range Name list further below.
While more advanced users are welcome to design their own templates from scratch, this guide is merely intended to show beginners how to make minor adjustments to the unlocked templates provided.
This step-by-step guide will show you how to print your company logo to the right side of your company name, in lieu of the default left side:
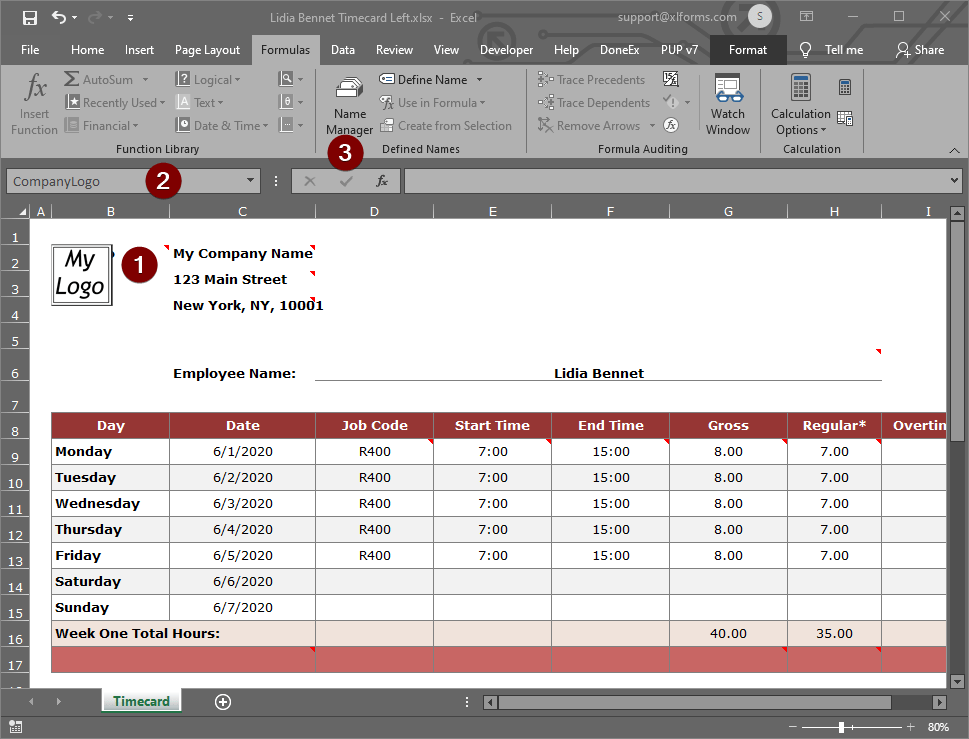
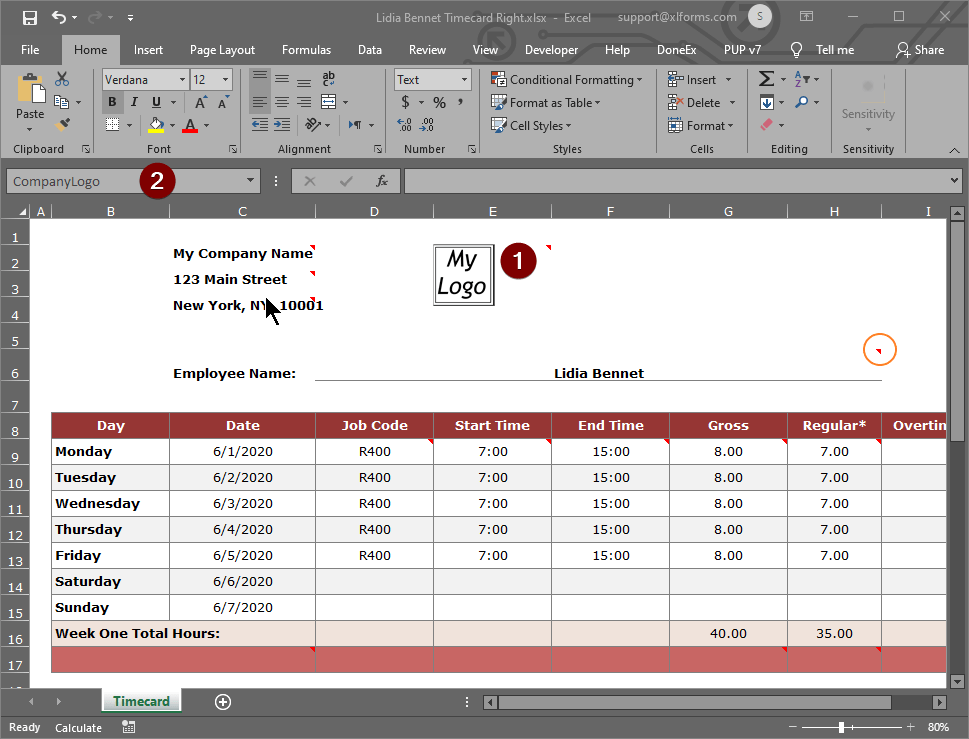
If you look closely at Image 1, you can see the My Logo1 start position is in cell B2.
Inside Excel’s Name Box2 you can see the range name “CompanyLogo”. In this example, we have specifically assigned the range name “CompanyLogo” to the cell B2. When you print your timecard, the application will go into your settings and pull the image you uploaded as a company logo, inputting it into cell B2.
Let’s say that you simply don’t like having your logo to the left of your company name, and want to place it on the other side.
To do so, you would follow these steps:
- From the menu, select the Formulas
- Look for the Name Manager3 icon and click on it.
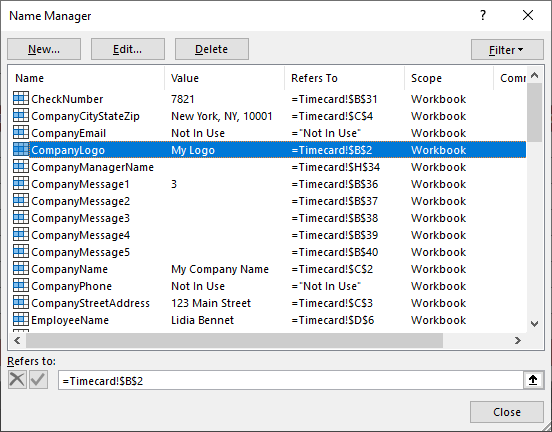
You will see a screen similar to the one in Image 2 (above). This is Excel’s Name Manager. If you look closely at the selected line, you will see that the name “CompanyLogo” refers to “=Timecard!$B$2”.
In the next steps, we will change the current range B2 to our desired location on the other side of the company name, in this case E2.
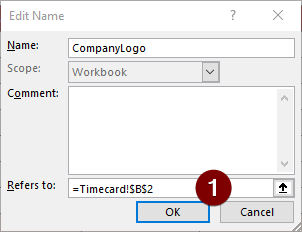
- Double-click on the selected line, and the “Edit Name” screen will open (Image 3).
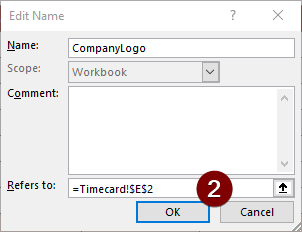
2. Now, let’s edit the Refers to: box1 from “=Timecard!$B$2” to “=Timecard!$E$2” (optionally, you can use the arrow keys and navigate to the cell that you want to use).
The window should now look like Image 4 (below).
3. Click the OK button2 to accept your change, and click the close button to close the Excel name manager.
4. Finally, save your template and close it.
Once you add your new template to Timecard Generator template list, you will be able to use it. If you followed the above instructions, your template should look like Image 5 (below).
Looking closely, you can see your company logo is placed in cell E21, with the “CompanyLogo” as the designated name range2.
It is as simple as that! Below you will find a chart with all of the preset name ranges so that you can adjust your template with ease, following the instructions in this manual.
Note: For your convenience, the unlocked template has every name range that is in use by default marked by red in the corner of the given cell (see the example in Image 5, circled in orange). These simply let you know where the default name ranges are placed, so you can more easily copy or move them to your desired location.
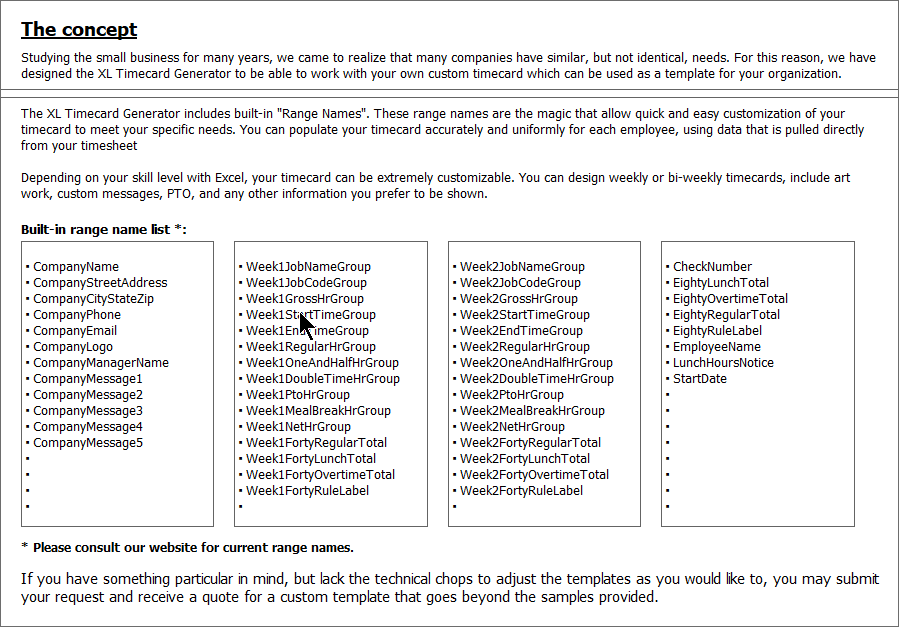
Range name list:
The following range names are arranged my logical groups, and can be used for a custom template:
Company information codes:
| CompanyName | CompanyStreetAddress | CompanyCityStateZip |
| CompanyPhone | CompanyEmail | CompanyLogo |
| CompanyManagerName | CompanyMessage1 | CompanyMessagB2 |
| CompanyMessage3 | CompanyMessage4 | CompanyMessage5 |
Week1 codes:
| Week1JobNameGroup | Week1JobCodeGroup | Week1GrossHrGroup |
| Week1StartTimeGroup | Week1EndTimeGroup | Week1RegularHrGroup |
| Week1OneAndHalfHrGroup | Week1DoubleTimeHrGroup | Week1PtoHrGroup |
| Week1MealBreakHrGroup | Week1NetHrGroup | Week1FortyRegularTotal |
| Week1FortyLunchTotal | Week1FortyOvertimeTotal | Week1FortyRuleLabel |
Week2 codes:
| Week2JobNameGroup | Week2JobCodeGroup | Week2GrossHrGroup |
| Week2StartTimeGroup | Week2EndTimeGroup | Week2RegularHrGroup |
| Week2OneAndHalfHrGroup | Week2DoubleTimeHrGroup | Week2PtoHrGroup |
| Week2MealBreakHrGroup | Week2NetHrGroup | Week2FortyRegularTotal |
| Week2FortyLunchTotal | Week2FortyOvertimeTotal | Week2FortyRuleLabel |
Other codes:
| CheckNumber | EightyLunchTotal | EightyOvertimeTotal |
| EightyRegularTotal | EightyRuleLabel | EmployeeName |
| LunchHoursNotice | StartDate |
